Sometimes though there is a blemish that I can't ignore...RUST!!! Once in a while when I unpack my tools from a class or if I accidentally leave them next to a corrosive (like Silver Black or other corrosive solutions) or get them wet and forget to dry them off, I spy little sections of rust starting to form on my beloved tools. Rust is the enemy of steel and it has to be dealt with before it becomes an issue.
If I see just a small bit on the surface I'll just buff it away with a swipe of steel wool, but that is just a temporary solution. Rust has a tendency to creep and needs to be eradicated before real damage is done.
No worries! The tool doctor is in and let's meet the patient that I am restoring to health today and the review the supplies I'm using.
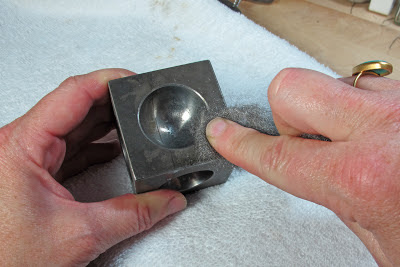
My dapping block. Check out the rust. Ick.
Here are my supplies from left to right: WD40, 0000 Steel Wool, 1000 grit sandpaper, Scotch 3M Metal Finishing Pad (Find them in the paint section of your hardware store near the steel wool) and Pro Polish Pads (the best thing for polishing metal EVER. Period. I stock them in my Etsy store.)
First, lay an old towel or rag on your work surface and make sure that you are in a well ventilated area. Spray the effected area with the WD40.
Then grab your steel wool and buff the WD40 into the surface of the tool. See how the rust starts to disappear. Don't wipe off the WD40 yet. Keep it on for the next step.
Next, follow up with the fine grit sandpaper. This helps to refine the surface of the metal. Make sure to use 1000 grit or finer as you don't want to mar the surface of the tool. After this step wipe away the WD40 from the tool.
And finally, grab a Pro Polish pad and buff the surface one last time. Make sure that the tool is completely wiped clean with no moisture on the surface. If the Pro Polish pads get wet they leave a gummy residue behind. But used dry they will make the metal shine like new!
Look! The surface is shiny and clean and there is no trace of rust to be found! The WD40 helps the metal resist further rusting. While you're at it check out your pliers, too. I'll bet the tips of your chain nose and round nose pliers might need a little love, too.
My Xuron tools were looking a little sad, but are now revived and ready to work on an upcoming wire wrap project.
Taking a little time to tend to your tools will give you many years of use. Do you have any tips on how you care for your tools? Share them in the comments, I'd love to hear them.


Kate, love these tips! I also like to put a little lubricating oil in the joints of my tools to keep them running smoothly.
ReplyDeleteKate - great tips! I'm gonna share this!!
ReplyDeleteAbby
Great, great tip and instructions. Thanks so much for sharing it!
ReplyDeleteThank you I needed this information.
ReplyDeleteThis is great, Kate - clear and useful! But could you perhaps also post a similar tutorial on how to nurse a scratched & dinged steel bench block back to health? I would so appreciate it - and I bet many others would, too!
ReplyDeleteKate, thank you for sharing such helpful info!! :-)
ReplyDeleteWow, I needed this! What a great way to tackle this job!!
ReplyDelete