Wednesday, February 29, 2012

Simple Knitting

I love to knit. I have knit socks and sweaters and other time-consuming stuff, but sometimes you just need something quick and cute on your needles. (If you are a beginner, this is an easy one!)

Enter the TGV shawl.

I found this great pattern on Ravelry. I used size 5 circular needles and this wonderful yarn in lightweight.

The yarn knitted up beautifully in simple garter stitch.

 
And now I have a beautiful scarf to keep my neck warm. (P.S. If you are not on Ravelry and love to knit, go there NOW. Prepare to spend the rest of the day online looking at knitting and crocheting. I'm Beadkate on Rav and my projects are listed here. You have been warned.)

Wednesday, February 22, 2012

Enraptured By Tiny Squares

Looky!

What the heck are those, you may ask? Those are boxes and boxes of 1 1/2" fabric squares. Arranged by color. Stacked in old Saran Wrap boxes. Nope, these don't belong to me. They belong to quilter extraordinaire, and the proprietress of Hen Scratch Quilting, my friend Janet.

Here she is with her square-aganza.
Every time I go on a quilt retreat with Janet, like this past weekend, I learn something new. I just watch what she is making and absorb her knowledge like a sponge.

She began by pulling out the aforementioned fabric squares and started laying them out on Fusible Quilter's Grid. Then after ironing the entire piece to fuse the squares to the grid, she folded lengthwise along one grid line and stitched a 1/4" seam all the way down. She repeated folding and stitching in one direction, then clipped the intersection of each square. Then she turned the quilt and stitched the other direction.

Here is a photo.

The results are perfectly stitched 1" squares. Next she made a quilt sandwich with the top, some cotton batting and a plain piece of fabric for the back and stitched diagonally across the squares to hold everything together.

Then she squared it up and bound the edges. She made two quilts and they now reside in a cradle, ready for her granddaughter to play with.

She appliqued a doggie on the back of the top cover. I am 45 years old and I wanted to play with that cradle more than anything!

Instead, I got to work.

And cut and sewed and cut and sewed until I made this bag.

It's kind of big, but I love it!

It measures 17" x 12". I put a pocket on the back and it's perfect for toting around my laptop and other random items. I used premade handles and stitched them to the bag with short strips of leather.

More tales from my quilt weekend to come later, but now I am off to cut more squares! You think Pinterest is addicting? For me it's got nothing on these tiny squares.

Saturday, February 18, 2012

Quilting...

I am at a wonderful quilt retreat this weekend. Here is a sneak peak of my project.


Stay tuned, 'cause after I get back I have a couple of posts planned on how I cut those super cute bird shapes... and an awesome project using the tiniest squares of fabric imaginable!

Now off to make five more squares!

Wednesday, February 15, 2012

Jade Scott Pinwheel Challenge.

A few weeks ago I entered a contest to win one of Jade Scott's lovely pinwheels on Lorelei's Blog and lo and behold...I WON ONE!!!

Photo from Jade Scott. Look at all of the pretty colors!!!
The task at hand for seven lucky participants (and anyone else who wanted to purchase one and play along) was to create a piece of jewelry featuring the pinwheel that you received. I got a grass green one. (My FAVORITE color and the one that I was hoping to get.)

So I whipped up this little number.

A ring...so I can look at this pretty pinwheel all the time.
I am so happy with it. Here are some fancy snaps.

I made a simple soldered band ring and then soldered the stamped circle to it. I punched two holes in the circle and secured the pinwheel with 22-gauge sterling silver wire.

I stamped "Any Way the Wind Blows" around the front.

And "Wind" on the back of the band.

Thanks so much to Lorelei and Jade for sponsoring such a great challenge. Jump on over to all of the participants to see what other treasures were created with this lovely component. I can't wait to see what everyone else made.
and also .....

Tuesday, February 14, 2012

Valentine's Card Challenge

I was lucky enough to participate in the Valentine card challenge hosted by Michelle Mach. She sent out 20 cards to people who were up for the challenge. She has compiled a great pictorial of them over on her blog.

I made mine into a wall hanging with some added quilting.


And if you have not read about it already, I have more Valentines to give out to the next five commentors on the blog post from Sunday. Five are spoken for but there are five left! Click over and read all about it.

Happy Valentine's Day, everyone!

Sunday, February 12, 2012

Have a Heart

Another result from my creative whirlwind. The Amour Necklace. Just in time for Valentine's Day.

It features the piece of patina-ed metal that I made earlier this weekend. I LOVE it. I wire wrapped a heart (a wonderful, flocked heart bead) and stamped and riveted a banner-shaped blank to the metal sheet.

I made a couple of my Rolled and Wrapped beads to accent the beaded strand.

And I fabricated a clasp from some scrap copper that I had practiced my stamping on. The stamping came out pretty well, so I thought I would use it for the clasp instead of throwing it on the scrap pile.

I have some of those hearts left over and thought I would share them with you. They are funny, flocked plastic but I kind of love them. I have saved a few for me, so I thought I would give the extras away to my readers.


If you would like one, just leave a note in the comments. (The hearts are spoken for) The first ten who ask, get one. I'll take care of the postage and throw in a few more beads as well, just for fun. You can make something with it, or just hang on to it. It's my Valentine gift to you!

Just make sure that I have a way to contact you in your comment. Then I can get your snail mail info privately and send your package off.

Happy early Valentine's and thanks for reading!

Saturday, February 11, 2012

Playing with Patinas

I have had color on the brain lately. Must be the spring (!) flowers that are popping up in California already.

I found a remedy for my colorlust. Yesterday I was dropping off some class samples at Bead Inspirations in Alameda, CA and saw these on the shelf. So I bought a bunch.


I am hooked. Now I want to patina every piece of metal that I have with alcohol inks. I experimented with the metallic and colored inks on copper sheet and got great results.


Before applying the inks, I textured the metal sheets and then annealed them. I did not remove the firescale after heating as it added to the depth of the patina. I sprayed them after they were dry with some acrylic fixative.

I made earrings out of the two smaller pieces.

The earrings feature Peridot and Freshwater Pearls. I am incorporating the larger piece of metal into a necklace design that I'll share with you next week. It has a Valentines theme and I think it's coming out pretty nicely.

Have a great weekend, everybody!

Friday, February 10, 2012

Endless Knotted Strand Tutorial

I had a student contact me on my Facebook page the other day with a question on how finish off a knotted necklace without a clasp.

I thought I would respond via the blog so I could share this technique with all of you as well. If you are looking for a tutorial on how to knot pearls, you can read my latest article in BeadStyle magazine. (You can purchase one, here.) You can also check out my guide to necklace lengths so you can choose the right length for you. 

 Choose your thread. I use nylon or silk beading thread. You can use any type of thread you like but I prefer silk or nylon. The main thing is to check the size of the thread in relation to the size of the bead hole. The thread should fill the hole, but still allow the bead to slide smoothly and freely down the thread without much effort.

Cut your thread and string it through your needle so that it is doubled over. Fold a piece of tape to hold the ends together. Leave about a 3" tail.

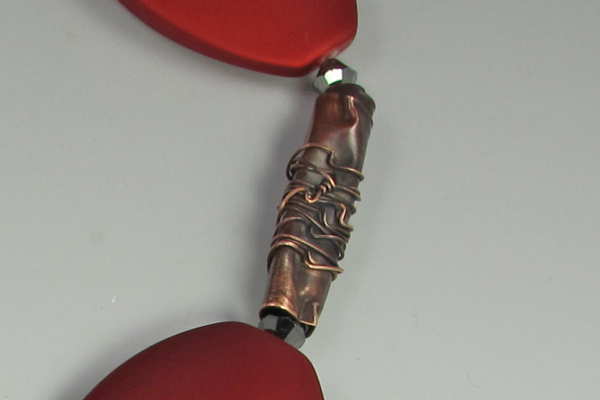
String on a bead with a large hole at the end. It will need to accommodate four strands of thread for the final closing knots.

String on a pearl. Do not tie a knot between the large holed bead and the first pearl. Tie a knot after the first pearl and continue knotting until all beads are knotted on the strand. (This is a short strand for demonstration purposes. Your necklace will need be be at least 22" long to slip over the head.)

 Do not tie a knot after the last bead.

String the needle through the large holed bead.

Pull the threads so the necklace tightens up. Cut the needle end of the thread leaving about a 3" tail.

Tie a single overhand knot (thread ends right over left) and tighten.

Turn the entire piece over and tie a complete square knot (right over left and left over right.)

Repeat on the other side.

Seal the knots with clear nail polish and let dry overnight. Cut extra threads away with a pair of sharp scissors.

Your necklace is complete!

Hope that quick tutorial helps! If you have any questions about this tutorial or any other beading or metalworking technique, leave me a message on my Facebook page or shoot me an email. I may just answer it here on the blog!

Wednesday, February 8, 2012

More of My Creative Space

Whew! It's been a couple of BUSY weeks! The spring (well, not quite spring yet) cleaning bug bit me hard and I have been in reorganization mode.

I focused my energy on my creative space. And good thing, too. It was getting, a bit, uh, shall we say unorganized. (That is the polite term for a junked-up, messy pile of you-know-what.)

My original work table was great. It worked for metals and soldering, but I needed a place to BEAD. Plus I did not have a place to store my hammers so I could reach them easily.

So one trip to IKEA and the hardware store later, (and one clearing of a messy corner) I now have this...

A bead table.

The peg board is very handy. Originally it was white, so I spray painted it a nice dark brown color to blend in with the wall. I hung some of my bead strands up for inspiration. My hammers finally have a home!

I also sorted some of my wayward beads... They needed to be relocated to where most of the beads live in my house.

The bead cabinet. It's one of my most favorite things, ever.

Most of the drawers have beads sorted by color, but this drawer is where my ends-of-strands or single beads go. It is full of random bead mixes.

So, there it is. I have some great ideas to share with you soon, so stay tuned. My creative space is going to be hopping with new projects and I have a "how-to" coming up in the next few days.

Now, off to mess up my new table!