

Click on the photos to enlarge.
This is my worktable. I like everything to have its own space so I can find it when I need it. Having an organized work area is a big help to my creative process. Since I have everything handy and it is usually fairly neat(ish), I can jump in and work when the mood strikes.
It took me a while to come up with this configuration and it still needs a few tweaks, but so far this works for me.
I like to do the majority of my designing and metalwork standing up, but also have a high stool that I can pull in when I feel like sitting.
The baskets on the bottom shelves house tools, a few display items, my tumbler and my dremel. The drawers hold my dapping blocks, small hand tools, metal stamps and other essentials.

The three shelves above my worktable display my favorite jewelry pieces and other fanciful objects that I like to have hanging around. Those pieces of blue pottery (from when I was little) give my space a sense of whimsy and add a splash of color. I love that dancing lady. Yes. Those are spindles on the left. The crochet covered rock is from my super talented friend Susan.

I like to have a pretty display near my workspace to help to inspire me. I like how everything seems at home on these shelves. I like to pull inspiration for designs from jewelry I have made in the past, so I have some pieces on display here. You may have noticed I also have a thing for small leather carryalls. I found both these vintage pieces ages ago and now use them to carry my pliers when I teach on the road. Another blue glass piece off to the right. You can never have too much blue glass pottery!

I also like to keep magazines and books featuring my designs stored close by. Sometimes, when self doubt threatens the creative process, I like to look at them and see my name printed on shiny paper that did not come out of my own printer. That row of houses is a favorite toy from childhood. Many hours were spent making a village with those houses and trinkets that I would find around the house. I think they were a gift from my mom when I was two? Three? She has excellent taste in gifts. There is another spindle and some yarn I spun stacked up there, too.

I have my sketch/idea book and collection of Sharpie markers. Sharpies are some of my most favorite things ever.

And my tools on magnetic strips so they will all be in reach. Those lovely carving tools were hand made by master metalworker Bob Burkett.
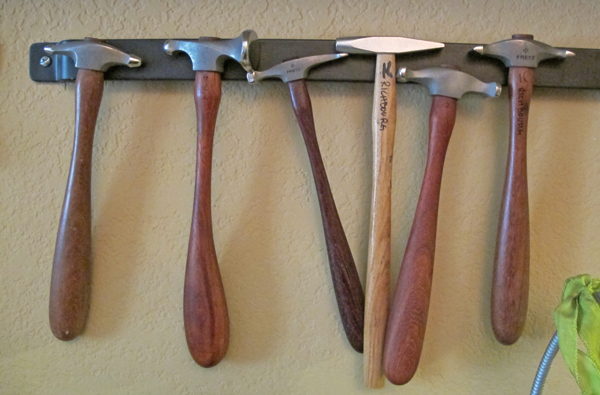
Hammers. Mostly Fretz.

Pliers. Mostly Lindstrom.
Everything ready for me make to something special.
Where do you create? What is your favorite feature about your creative space? What does your dream space look like?
If you are feeling creative this weekend, come spend some time with me. I'll be packing up some of these tools and heading over to Bead Inspirations in Alameda, CA for a creative metalworking day. All the details are here.


