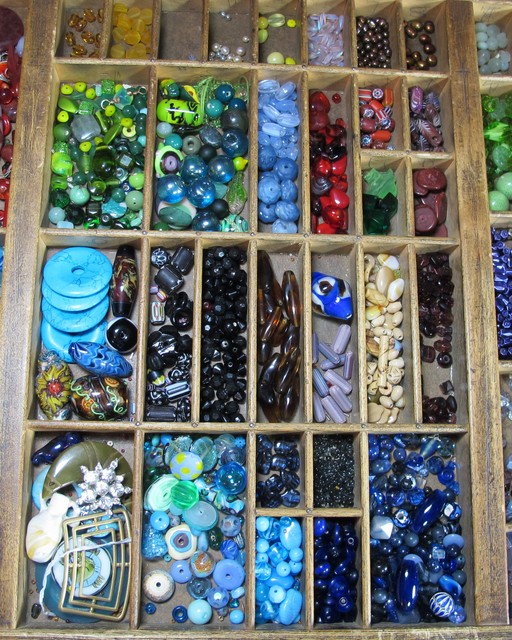
Showing posts with label Beads. Show all posts

Monday, October 27, 2014

Playing With Beads

I love metal. Soldering is my thing. But like many of you I started as a beader. The simple act of putting beads on a string is so relaxing, plus you get the added bonus of a necklace to wear at the end of it all.

I have not made a necklace in a while and inspiration arrived in the form of this wonderful post over at the Beadshop.com blog, about their employee beading day. It was a walk down memory lane for me, as this is where I got my start in the bead biz back in 1992. Owner Janice Parsons is one of the most gifted bead artists I know. She started beading many years ago at her mother's antique store. That store evolved into The Bead Shop of Palo Alto, CA and the rest is history. Now the legacy of The Bead Shop lives on online at beadshop.com.

Back in the day as an employee of The Bead Shop I lived and breathed beads. Every day there was a new challenge, a new necklace to string or earring to wire wrap. We had such BEAUTIFUL beads. Vintage, semi-precious, tribal, handmade... you name it, we strung it. I learned a lot from Janice, my fellow employees and our wonderful customers. That experience started me on my beaded career path.

So... seeing the great bead combinations that JP and her gang put together on their team beading day made me want to get out the beads and create. And that's just what I did. I took photos along the way to share my process. This is a photo-heavy post. To see the pictures in more detail, click on each to enlarge.

I wanted to create a piece that was reminiscent of my early beading days. The first beads I loved had a tribal/ethnic feel to them. I poked around in my bead stash and put this mix together. I really didn't have a finished design in mind other than I knew I wanted to make a multi-strand piece strung in a random style.

Metal  spacers are a MUST! That strand of copper heishi dates from my early Bead Shop days. I used to put that bead in everything I made.

I added some seed beads to the mix. Tiny beads are a must in a random multi-strand design. These great beads came from Baubles and Beads in Berkeley, CA (another great local-to-me bead store.)

Aren't these AMAZING!!! Czech glass picasso beads, also from Baubles and Beads. I threw those in the mix (even though I wanted to hoard them.)

I got this clasp from Saki Silver at BeadFest this past August. The cones are from Tierra Cast. Cones are perfect for closing multi-strands.

I cut 5 long strands of nylon bead thread and began to string. Random pattern. Stringing each strand a bit before passing over to the next so they grow at an even pace.

Added in a turquoise disc for interest. Divided and passed the threads through the center hole. At this point I felt that I needed an additional strand, so I untied the knot I made at the beginning, added another thread and strung it to this point.

Added beads so they covered the thread over the disc. Knotted everything to hold it together under the disc and kept going.

And going.

And going.

Until I reached the end.

To close, I tied all of the strands together in an overhand knot like the one I made at the beginning. I added a drop of Hypo Cement to each knot and let dry. Then I cut the thread just above the knots.

To attach the cones, I cut a piece of 18-gauge wire and made a loop at the end to capture the strands and wire wrapped the loop closed.

I slid the cone down and wire wrapped the clasp to the end and did the same for the other side.

And that's it! The necklace is ready to wear.


This project is a great way to work with beads in your stash. Thanks for the inspiration, Bead Shop team!

Tuesday, September 24, 2013

The Fine Art of Knotted Beads

I bought myself a little treat last week for my birthday. Two lovely strands of Blue Apatite Beads. All. For. Me! I thought the best way to string those beauties would be to knot them. I love to knot. It adds so much flair to a simple strand of beads.

I thought I would share what I did with you. Here is the story:

I used two 16" strands of apatite beads, size 2 nylon thread with needle attached, a clasp, a black skull bead,  4 small spacer beads and a rhinestone bead all from my local bead store, Baubles and Beads in Berkeley, CA.

Start by tying a knot at the end of the thread and slide on an endtip (photo 1). Pass the tail through the loop of the knot several times to make a bulky knot that will not slip off the strand. Then string your beads, one by one, and tie an overhand knot after each. Use a fine-tip tweezers if needed to slide the knot into place.

Finish by sliding on an endtip, cutting the needle away from the thread, unravel the threads so there are two ends and tie a square knot into the cup of the endtip (photo 2). Make a bulky knot so that it does not pull through. Seal the knots with clear nail polish and let dry so they won't unravel when the tails are cut away.

And that's it! You can find my tutorial on making an endless knotted strand at this link. And all about how to choose the right necklace lengths here.

You can see that the rhinestone and skull beads are near the clasp. I can wear those in front or scoot them around to the back. The necklace is long enough to wear as a double strand around the neck or wrapped five times around the wrist. It's also a great piece to wear long and layered with other pieces in my jewelry box. I love it!

Monday, November 19, 2012

Another Book, and It's FREE*

Okay. Some of you may remember my shout out for beads for a super secret project. Now the project is complete and I am excited to share it with you.

It's an enhanced eBook from Blurb.com.

And it's all about how to choose color for beaded jewelry in an innovative way. The book is based on a class I teach on color and I thought it was a great match for this eBook format.

And you know what... right now it's FREE!!!  (*Until December 15th...so grab it now!) The only drawback is that it's optimized for the iPad, so all of you other tablet owners are out of luck for now. (However, you can check out one of the videos from the book on my YouTube channel.)

Get your copy of the book at this link. I am really excited about this new technology from Blurb.com. I think the eBook is great for "How To" projects as you can add short videos, links and a lot of photos. You can learn more about making eBooks on their website.

Remember to grab my book soon, as the price goes up to $9.95 on December 15th. Let me know what you think and enjoy!


Sunday, October 21, 2012

My segments on Beads, Baubles & Jewels.

Newsflash! Do you watch the PBS series Beads, Baubles & Jewels? It's a great show on all things bead and jewelry-related. The super-talented Katie Hacker is the host and she creates a great line-up of interesting shows with jewelry experts from around the country.

I filmed three segments back in July that are airing soon. It was a lot of fun! The show shoots just outside of Cleveland, OH. But luckily I did not have to travel alone. My trusty sidekick, Torrance was there every step of the way.

While I worked hard on set...


Torrance lounged around the hotel and called for room service. He eventually made it to the studio and took over for one of the camera guys...

It didn't take the crew long to notice that a bear was trying to run the overhead camera, so he was banished to the green room...

...where he consoled himself with some beads...

...and hooch. (I am not sure how he got it. I should check my credit card statement. Do liquor stores deliver in Ohio?)

Torrance and his hijinks aside, it was all great fun and I can't wait to go back in December to film more segments. The previews for the current season are on YouTube and available for your perusal. The Sampler project and Ruby Tag Pendant are from my new book, and the Rolled and Wrapped Bead and Patina project is a class I teach at bead stores and national shows.

Click on each link to view: You can take a look at the entire schedule for this season on the BB&J website

Color On Metal Beads with a Torch
Ruby Tag Pendant
Soldering a Jump Ring

Friday, March 30, 2012

From the Archives

For your perusal, the latest installment of "From the Archives" where I share some well-loved jewelry that hasn't seen the light of day for a while.

The theme for this installment is Simple. "WHAAAAAAT?!" you exclaim? "Simple? Really? But I thought your style was asymmetrical, free form and the-more-beads-the-better." Well, you are right. I do like throwing beads in a bowl and caution to the wind and just string.

But sometimes it's different. Sometimes you look at a strand of beads and think WOW. Those are so pretty that they just need to stand on their own. The challenge with a necklace like that, (at least for me) is to keep the design clean and uncluttered with just the right amount of enhancement to keep it from being dull. (Insert technical note here: All necklaces are strung on SoftFlex beading wire. .014 for the tourmaline and .019 for the turquoise. I don't use any other nylon coated beading wire brand. I have been using SoftFlex since it came out and it is the BEST.)

I have a couple of necklaces that I think fit into that description.

A simple strand of color-graduated tourmaline. The quality of these gemstone beads were really nice, so I wanted to let the beads stand alone. This is actually two strands that I combined and kept them in color order.

I used a simple toggle clasp and embellished the loop with some wire wrapped freshwater pearls. Also note the finishing detail at the end of the strands. I like my necklaces to have a nice touch at the end and I think this ties everything together. Add a jewelry tag and it's ready to go. I can wear it long or doubled around the neck. I usually wear it doubled with the clasp in front.

When I saw this strand I thought it was the PERFECT strand of turquoise. Graduated, some matrix, great color range. I wanted the strand to really stand out so I had to be careful about what I added to it. I wanted it to be interesting and have whatever I added to it feel like it was a natural extension of the stones.


I had this lampworked bead that I made from my series that resembled rocks. I thought it fit in nicely. The clasp also features a lampworked cabochon that I made. I used a simple brass spacer between each bead. The lampworked bead has a couple of silver daisy spacers around it. Perfect.

So there you have it. Simple and lovely and both are happy to see the light of day.

Tuesday, March 13, 2012

Spring Challenge Necklace

I was lucky enough to grab one of the beaded bracelets for Michelle Mach's Spring Challenge. (You can read Michelle's original post here.)

The challenge was to take an existing piece and use the components and create a new piece with a "spring" theme.

This is the original bracelet:

I struggled with this challenge a bit. I like sparkly things and I loved the two components individually, but my soul rails against a symmetrically patterned, dot-dash kind of design. I immediately cut the bracelet apart, so I could work with the two beads as individual elements. Then I continued the process by paying a visit to my bead stash and pulling some beads I liked.

I couldn't decide whether to go with the off-white freshwater pearls, crystals and other shiny beads on the left of the picture or the more earthy tones on the right.

I went with the earth tones. In my mind, spring means gardening, and gardening means digging in the dirt under the blue sky. (Artistic license can justify just about anything.)

I squirreled away the rhinestone spacers to use in another project. "Spring" just did not include anything that shiny. Unless you are a magpie. In which case I could have used them, since I like birds. However, magpies don't wear necklaces. And regardless of how much I like little animals in accessories, I am digressing and veering way off point. Kind of like a magpie.

Here is the necklace.

I strung a 50" necklace. I call it "Long is the New Short". Here are some detail shots:


Since it is such a long strand I can wear it wrapped twice around my neck or six times around my wrist. (Like I am doing right now as I type this.) Wrist photo, here. Thanks Heather for the suggestion.

Thanks, Michelle for hosting this great challenge. This was a fun piece to string.

Be sure to visit the blogs of the other participants. It's a talented group and I am looking forward to seeing everyone's work.

Michelle - Beads & Books [Hostess]

Andrew - The Writing & Art of Andrew Thornton

Christa - Adventures of One Beady Woman

Dita - Alankarshilpa

Donetta - Simply Gorgeous

Erin - Erin Siegel Jewelry

Heather - As I Bead It

Jean - Snap Out of It Jean - There's Beading to Be Done!

Karen - Over the Moon Design

Kate - We Can Make That At Home That's me!

Kay - Palm Coast Art

Kim - CianciBlue

Kristina - Wild Roses and Blackberries

Linda - Lindy's Designs

Lisa - Pine Ridge Treasures

Marlene - Amazing Designs by Marlene

Michelle - Reverie & Revival

Pam - The Crazy Creative Corner

Pamela - Someday Beads

Renetha - Lamplight Crafts

Sharyl - Catchenthesun

Terry - Pink Chapeau Vintage Jewelry

Therese  - Therese's Treasures